

DashScan II Installation
The following is only a guideline, please refer to the proper service manual for the complete procedure! Be extra careful not to scratch anything. It's especially easy to miss one of the torx screws and scratch one of the trim plates. Need I mention these are discontinued by GM?
This procedure assumes that you have already removed the instrument cluster and housing, and removal of the steering wheel (not the steering column!) makes removal of the dash out of the car easier, but is not absolutely necessary. Use your own judgement.

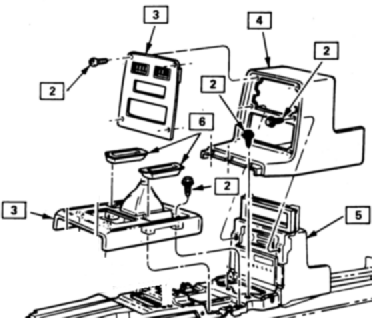
| First, begin by removing the shift knob. On manual transmission Fieros, just unscrew the knob counterclockwise, on automatic Fieros, you need to remove a U-shaped clip with a screwdriver. Next, remove shifter console (3) by removing the four 7mm bolts under the ashtrays (6). On automatic Fieros, untwist the shift dial lamp socket as well. Now, remove the radio surround console (4) by carefully removing the four torx screws for the radio surround trim plate, then two bolts between radio and heater controls, and three more at the forward bottom part. |
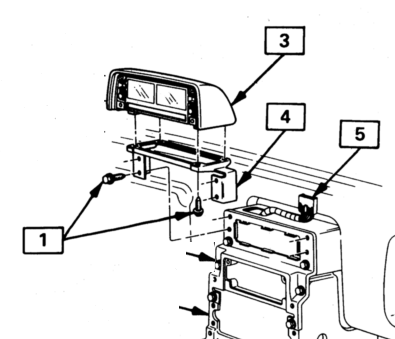
| If equipped, remove auxiliary gauge cluster (3) by removing the four 7mm bolts (1) that attach it to the dashboard. Disconnect the connector (5) at the gauge. It is not necessary to remove the trim plate. Important: Disconnect auxiliary gauge cluster connector near radio as well; both connector ends must be loose! Wiggle on the cable to find the other end. If both ends are loose, you can just leave this cable in the dash instead of fiddling it through the small hole in the top. You'd never get it back in there anyway. | 
|

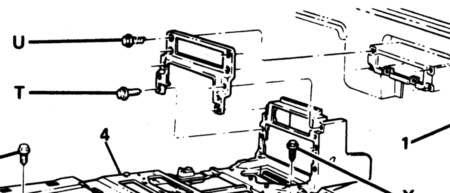
| Remove the (usually rusty) steel bracket around heater/AC outlet. Carefully pry the top of the console support backwards to disengage the two plastic tabs at lower rim of heater outlet. |
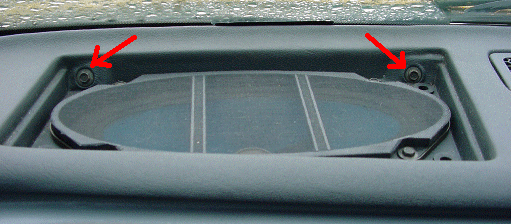
| Pop up the speaker covers with a flat screwdriver. Be extra careful not to damage your brittle dashboard! Remove the speakers, if they're still stock, there will be four 7mm bolts each, and the connector has a small latch, don't break it. Remove the four long 7mm bolts in the speaker cavities, two on each side (red arrows in the picture to the right). |

|
Finally, remove the hood release (three Philips head screws) and remove the 10mm bolt under the hood release. Then remove 10mm bolt near RH courtesy lamp and remove the Subwoofer if installed.
The dash should now be free (unless I forgot something here or there), and can be removed from the vehicle.
There have been visitors to this site since May 31, 2000.