DashScan II Installation
|
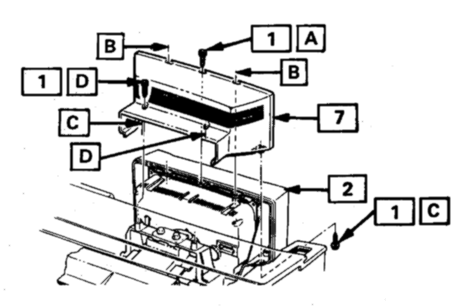
| The installation of the DashScan requires the instrument cluster to be removed from the vehicle. First of all, disconnect the negative battery cable (this is important!). Now remove the steering column cover (four 7mm bolts). Next, remove the rear cluster cover (3 Torx screws on top/front (A/B), 2 T-15 Torx screws on top/rear (D), two 7mm bolts on the bottom (C). This is shown in the picture. Remove front trim plate (4 T-15 Torx screws). Be careful not to damage or scratch either the trim plate or the instrument cluster Plexiglas in the process. |
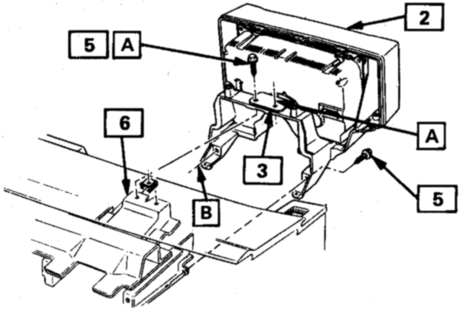
| Now, remove the two 10mm cluster bracket to steering column support bolts (A), and the two 10mm cluster to bracket bolts (B). See image to the right for reference. Disconnect all three cluster wiring connectors and remove cluster mounted switches/connectors. Now the cluster should be free. Pull the turn signal stalk straight from the column if it is in your way. It easily goes right back in. |
|
|
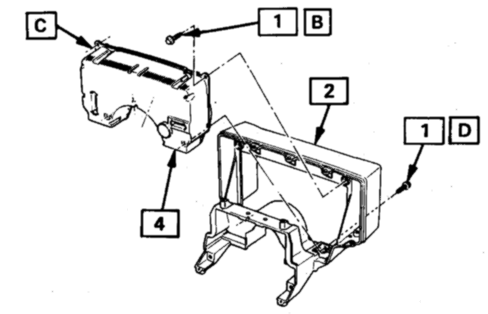
| Now you need to remove the cluster from the housing. In order to do that, you must remove two 7mm cluster attachment bolts (B) on the top/rear of the cluster and the two 7mm bolts (A) below the speedo/tach. Tilt the top of the cluster backwards and move the cluster out. The cluster usually hangs on the cluster housing, but the cluster gets past that part if you gently pry on the housing with your fingers until the cluster is through. |
There have been
visitors to this site since May 31, 2000.